
by Kristen Troy
Did you know four out of the five least cleaned household appliances live in your kitchen? This may be shocking to some because the kitchen is where your food is stored and prepared, and you’d expect it to be clean! But how many of us clean more than the surfaces in our kitchens regularly? Probably not as many of us as you’d think. Do you remember the last time you cleaned out your refrigerator, pantry cabinets, oven, or microwave? There may be some expired goods hiding in the back of the shelf or in the hard-to-reach cabinets. Dust, spills, grease, or bacteria could also be hiding in plain sight! It is essential for your health and your kitchen to regularly clean your pantry and kitchen appliances. Deep cleaning your kitchen can be overwhelming, so let’s break down how to clean by location and appliance.
Cleaning Your Refrigerator & Freezer

Refrigerator

Let’s start small. You’ll want to go through your refrigerated leftovers to make sure they are still good weekly. A good rule of thumb is to eat your leftovers within four days of making them. After four days, food has a higher risk of spoiling. Another small cleaning task you can incorporate to keep your refrigerator cleaner for longer is wiping containers off after using them. If you use a bottle and there is residue on the cap or dripping down the bottle’s side, wiping it before putting it back will help keep the inside of your fridge cleaner. Doing these simple tasks will make your life easier when it comes time to deep clean.
You’ll want to do a deep clean every three to four months. This may seem like a lot, but doing the deep clean three to four times a year will make it an easier task than doing it just once or twice a year.
To begin your deep clean, you’ll want to take everything out of your refrigerator and freezer. As you take products out, you can check the expiration dates and freshness, tossing anything that has expired or gone bad. Place products that need to stay cool in coolers so they don’t spoil while you clean. You can then unplug your refrigerator once it is empty; to start defrosting the freezer. If there is ice buildup, place a towel in your freezer to help sop up melting ice as it defrosts.
While the freezer is defrosting, you can clean the shelves and drawers out of the refrigerator. Clean the shelves and drawers thoroughly with hot soapy water. The shelves and drawers can air dry while you wipe out the inside of the fridge. You can wipe the inside of the refrigerator with a damp soapy cloth or disinfecting wipe. If you use a soapy cloth, be sure to use a second wipe to remove any soap residue.
After wiping the inside, it can air dry while you do a second check through your fridge’s contents that are likely all over your counters and in coolers. As you go through your fridge’s contents, discard any expired goods, old leftovers, or anything that has gone bad that you missed when taking everything out of the refrigerator. While sorting through the contents, be sure to wipe off all containers, bottles, and jars with a wet cloth. Doing so will ensure anything going back into your fridge won’t get your shelves or drawer dirty right away.
Freezer
The freezer is often forgotten because you can put goods in there and forget about them. Since frozen foods are usually good for months to years, we don’t frequently go through them. Take everything out of your freezer and put them in coolers. If you have ice trays, empty them and wash them thoroughly. Once the freezer is empty, you’ll want to wipe down any shelves in your freezer, including the door, any drawers, and sides, top, and bottom. Be sure to scrape off any ice buildup you come across. Ice buildup makes your freezer have to work harder to keep cool, so scraping and defrosting it a couple of times of year will help your appliance function more efficiently. While the inside of the freezer dries, you can wipe off everything you emptied from the freezer previously.

Before you plugin and return all your food items to your refrigerator and freezer, there are a few more things to clean. You’ll need to pull your refrigerator away from the wall so you can clean any dust, dirt, or dropped food items from underneath the fridge. While the fridge is away from the wall, you can clean dust or grime from the back of the refrigerator. You’ll want to check your condenser coils, either behind or beneath your fridge, for dust or dirt as well. When condenser coils are coated in dust and grime, they use more energy to create cold air and could shorten your appliance’s life span.
To clean your condenser coils, use a vacuum with a long narrow attachment to suck up dust and debris. Then remove built-up dust by carefully brushing the coils with a long narrow brush. Once you’ve brushed off as much as you can, you can vacuum the coils a final time to remove anything that came off with the brush.
Once the fridge, freezer, and all of their contents are clean, you can plug the refrigerator back in to get chilly. Afterward, it is time to repack the fridge and freezer and move on to the pantry.
Cleaning The Pantry
Cabinets

Cleaning your cabinets and pantry will be very similar to cleaning your fridge/freezer, except now nothing has to defrost.
Start by removing everything from your cabinets or pantry. If you do not have enough space to store everything on the counter, do one cabinet at a time. While emptying the cabinets, make sure to toss any food that is expired. As you go through all the non-perishables, consider donating any that you don’t plan to eat or that you don’t need to a food bank or local organization. Cabinets containing kitchen tools, equipment, and non-food items should also be gone through because crumbs and dirt can get into these cabinets. After emptying the cupboards, vacuum the shelves to remove debris and crumbs and then wipe out the shelves to remove any residues.
Once the cabinets are dry, it is time to replace the remaining items. Here are some tips for refilling your cabinets:
- Place food that is near expiration towards the front of a cabinet and at eye level. That way, you are more likely to see and use it before it expires.
- Transfer grains and snacks to transparent containers to better see how much of each you have and know when you need to get more.
- Place unhealthy foods such as potato chips near the back of cabinets and out of your eye line. This way, you will gravitate towards more healthy alternatives.
Now that the cabinets and pantry are clean, it is time to move onto places that may not contain food but should still be cleaned.
Drawers

Your kitchen drawers may not have food in them, but they can still accumulate crumbs and still deserve a good cleaning every couple of months. When you clean out your cabinets and pantry, add your drawers to your list of to-dos. Remove everything from each drawer to clean out any crumbs and wipe down any organizers or mats within each drawer. Toss or donate any tools that you don’t use any longer while you do this.
Cleaning Your Range
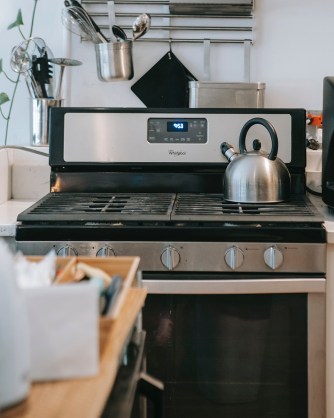
Oven
Your oven may have a self-cleaning feature, which can be handy to incinerate food bits leftover from cooking and baking, but it might not help you get all the baked-on grease. You could clean your oven with store-bought oven cleaners or go the DIY path with baking soda and vinegar. Simply spray your cleaner and let it sit for up to 45 minutes before wiping and scrubbing them off. For a gas oven, you’ll want to avoid spraying cleaner where the gas comes through; for an electric oven, try to steer clear of the heating element.
If you have removable racks, you’ll want to take them out and soak them in either hot water with dish detergent or use a baking soda and vinegar mixture. Soaking the racks will make them easier to wipe down and clean off.
The outside of your oven should get some help too. The knobs, screen, handle, and door should all be wiped down with a damp cloth. If there is a lot of gunk on a particular area, use some soap on your damp cloth.
Stove
There are many stoves styles, and with each, you’ll want to clean down the surface. Some stoves have removable pieces such as drip pans, grates, or griddles. You’ll want to remove any removable part to give it a thorough cleaning. Removing any drip pans or grates will allow you to wipe the area underneath it to remove any grease, drippings, food bits, or dust.
Cleaning Your Microwave

Microwaves are a useful, quick heating appliance, but that can lead to some overflowing bowls of oatmeal or sauces spurting all over the microwave walls. An easy way to get started cleaning your microwave is by heating a cup of white distilled vinegar for 5 – 10 minutes. This will create steam and loosen the splatters on the walls. Next, you’ll want to take a wet cloth or sponge and wipe the inside clean. If your microwave has a turntable, you can remove that and thoroughly wash it before placing it back inside.
Cleaning Your Dishwasher

You may wonder why cleaning a dishwasher is on the list if it is running soap through it and producing clean dishes and utensils. Well, all the gunk from the dirty dishes can get stuck in small crevices and the filter. To begin, remove all the racks, utensil holders, and the filter. Your filter will either twist off or require the use of a screwdriver to remove. Soak the racks, utensil holders, and filter in a mixture of hot water and vinegar for 30 minutes.
With the inside of the dishwasher bare, wipe down the sides, inside the door, top, bottom, corners, and spray arms, making sure to remove any debris. Fill a dishwasher-safe bowl with 1 cup of white vinegar and place it on the bottom of the empty dishwasher. Run the dishwasher on a hot water cycle. The vinegar will help break down any remaining bits of food, grease, soap scum, residue, and any other leftover grime. After the vinegar hot water cycle finishes, remove the bowl and sprinkle 1 cup of baking soda in the bottom of the dishwasher. Run the dishwasher on a short wash cycle if possible. Using the baking soda will remove stains for a sparkling, clean-smelling appliance.
A deep clean of the dishwasher once every six months will help it run efficiently and stay clean looking and smelling!
Other
Garbage, Recycling, and Compost Bins
The receptacles we use to collect garbage, recycling, and compost can start to smell over time, even if you are using a bag inside the container. These bins should be cleaned every 3 – 4 months unless there is a spill or broken bag, in which case you should clean it at the time of the incident. When your bins are empty, after your trash and recycling have been collected, take your containers outside. Rinse out the inside of each bin, sprinkle baking soda inside, and let it sit for 20 – 30 minutes. After it sits, you can use a brush to scrub the inside and outside of each bin. Rinse out the containers thoroughly, then let them air dry before using again.
Oven Mitts, Pot Holders, & Trivets
Oven mitts & trivets are kitchen tools that tend to not make it onto the cleaning to-do list, even though they often contact food. Depending on the type of oven mitts, pot holders, and trivets, you could throw them into the washer to get rid of food debris, stains, and any leftover residues. If they aren’t machine washable, you can hand wash them or wipe them down. It is best if you do this every couple of months. The 3 – 4 month timeline is a good one to follow, but you can always clean them before the three months is up if they look unsightly.
Is that all?
So many other tools or appliances may need regular cleaning, depending on what is present in your kitchen. Hopefully, this article has given you some tips on attacking your kitchen detox and making it a regular task! Good luck with your cleaning endeavors, and enjoy your sparkling clean kitchen!


